Program installation(s)
How to properly install the SAM programs (Basic installation to get you going).
Just follow the instructions, modifications in the setup will be discussed in the next chapter.
Create a new directory e.g. C:/sam/
Go to http://sam-europe.de/ => choose language => choose software dowloads and download the following files:
SAM operation software
SAM tools (sam_tools_eng.zip)
SAM logging software
Runtime libraries (libs.zip)
Default Sam-Ini Setup files (default_sai.zip)
Unpack them in the directory you just created (c:/sam).
Go to that directory.
Open sam_ini.exe
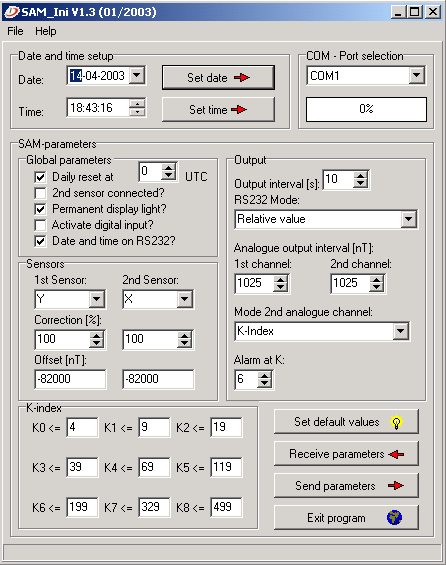
Press File (top left) choose Load Parameter Set and select:
default_1sensor.sai (if you use 1 sensor)
or
default_2sensor.sai (if you use 2 sensors)
If you want to upload these settings to the SAM, press F1 (commandmode) on the SAM, than Send Parameters from sam_ini.
The SAM has now been properly set and you can exit SAM_ini.
Open sam_log.exe
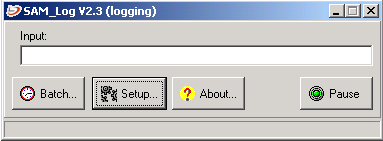
Press Batch
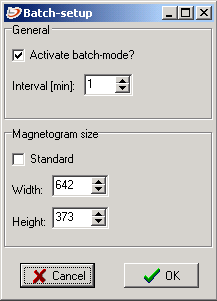
and set the setting according the example, than press OK
Press Setup
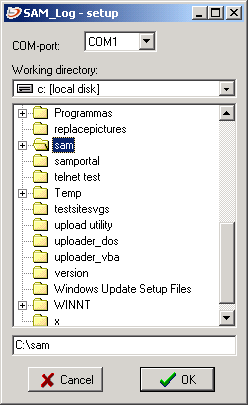
and select the directory C:\sam (or the directory that you created before), than press OK
You can now exit (X) sam_log.
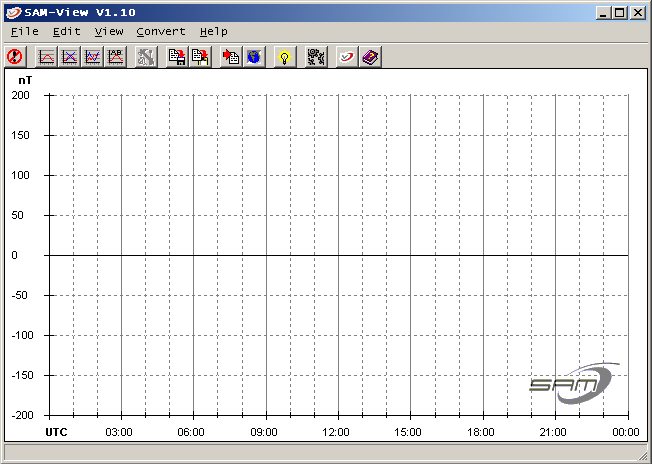
Open sam_view.exe
Press File
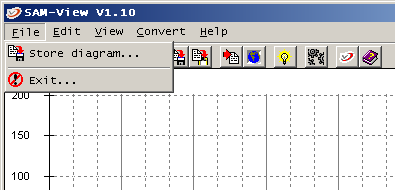
Store is to save a magnetogram picture (as bmp,jpg or png).
Exit to exit sam_view.
Press Edit
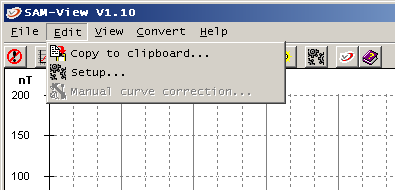
Copy to clipboard is to copy+paste the magnetogram picture in e.g. MS Paint.
Setup is to setup the magnetogram picture, press Setup

Fill in the following items:
Owner or station name
Location (City)
Longitude (E or W)
Breite (=Latitude, N or S)
IARU Locator (see: Locator )
Fill in the given values in the k-index table.
Alarm ON at K=4
Activate the shown k-index parameters.
Set the Y-scale to fixed range +/-200 nT
Autoscale ON
Then press Colors
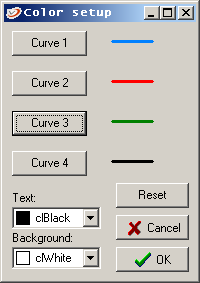
Then press Curve 1
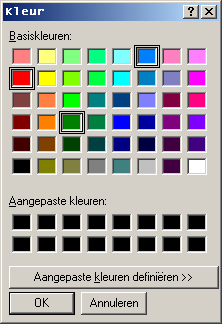
The colors depend on the magnetic field direction you wish to measure.
If sensor 1 is for:
Bx (N/S) then the color should be BLUE.
By (E/W) it should be RED.
Bz (up/down) it should be GREEN.
If you have 2 sensors, nr 1 for Bx and nr 2 for By than the color for curve 1 should be BLUE and for curve 2 should be RED.
Use the colors as shown on the palette, they assure the best readability.
After you made the color changes, press ok in color-setup.
Press Batch
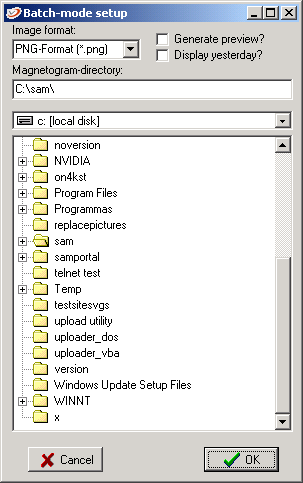
Select the picture format , png,bmp or jpg. Choose png (smallest file).
That select the directory, use the initially choosen directory, where all programmes are saved, again.
One more button left, Default, DON'T click it, it will reset the k-index values.
Click on OK (batchmode setup) and OK (Setup). All changes you made are now saved.
Press View
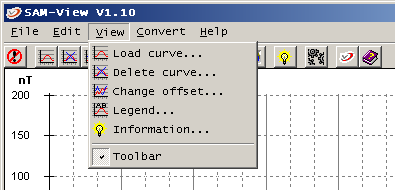
and select Legend
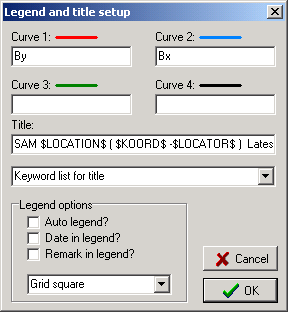
Copy and paste the following line into the TITLE field :
SAM $LOCATION$ ( $KOORD$ - $LOCATOR$ ) Latest data from $DATE1$ / $TIME1$ UTC
Click on OK (legend and title setup), and Exit (sam_view).
The basic setup is done.
Is your SAM-box + sensor connected via the RS-232 port than the program can be activated like this:
Open sam_log.exe , press batch and [V] Active batch-mode.
Press [OK] and leave the programm running.
Look with your explorer in the sam directory, after a little more than 1 minute the following NEW files should appear:
sam_data.log
sam_data.png
sam_data.sam
sam_data.txt
20030426.txt (the number is the date today, so changes every day)
As soon as sam_data.png becomes available, or is renewed you will have the latest magnetogram.
Open the file magnetogram.html
The latest magnetogram is now visable and will automatically refresh every 2 minutes.